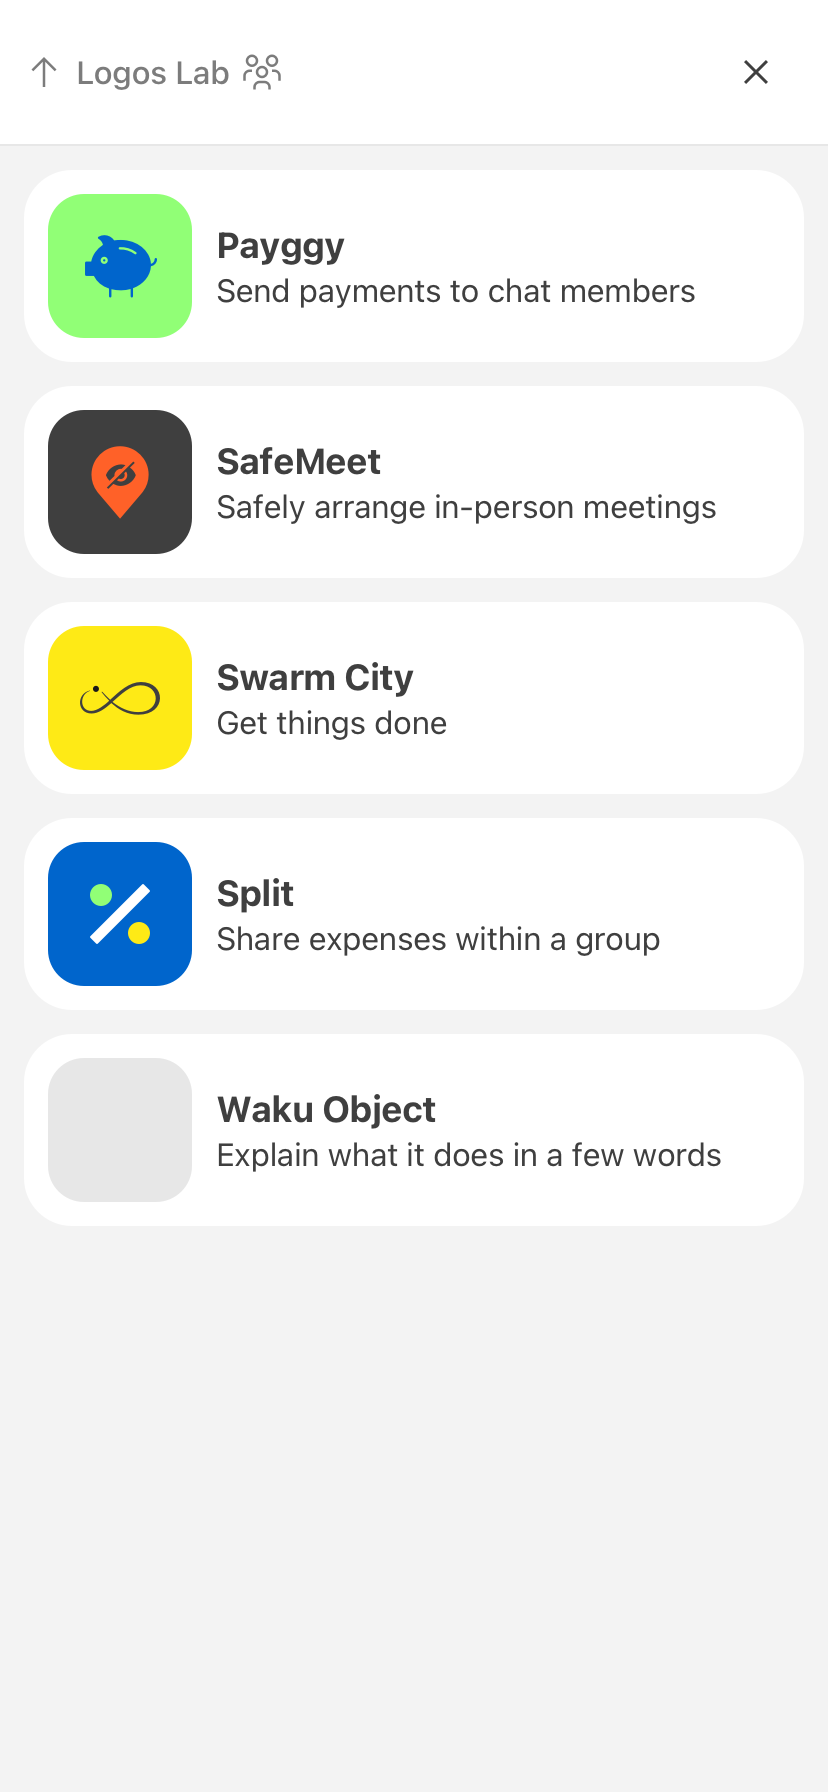
Adding to Chat
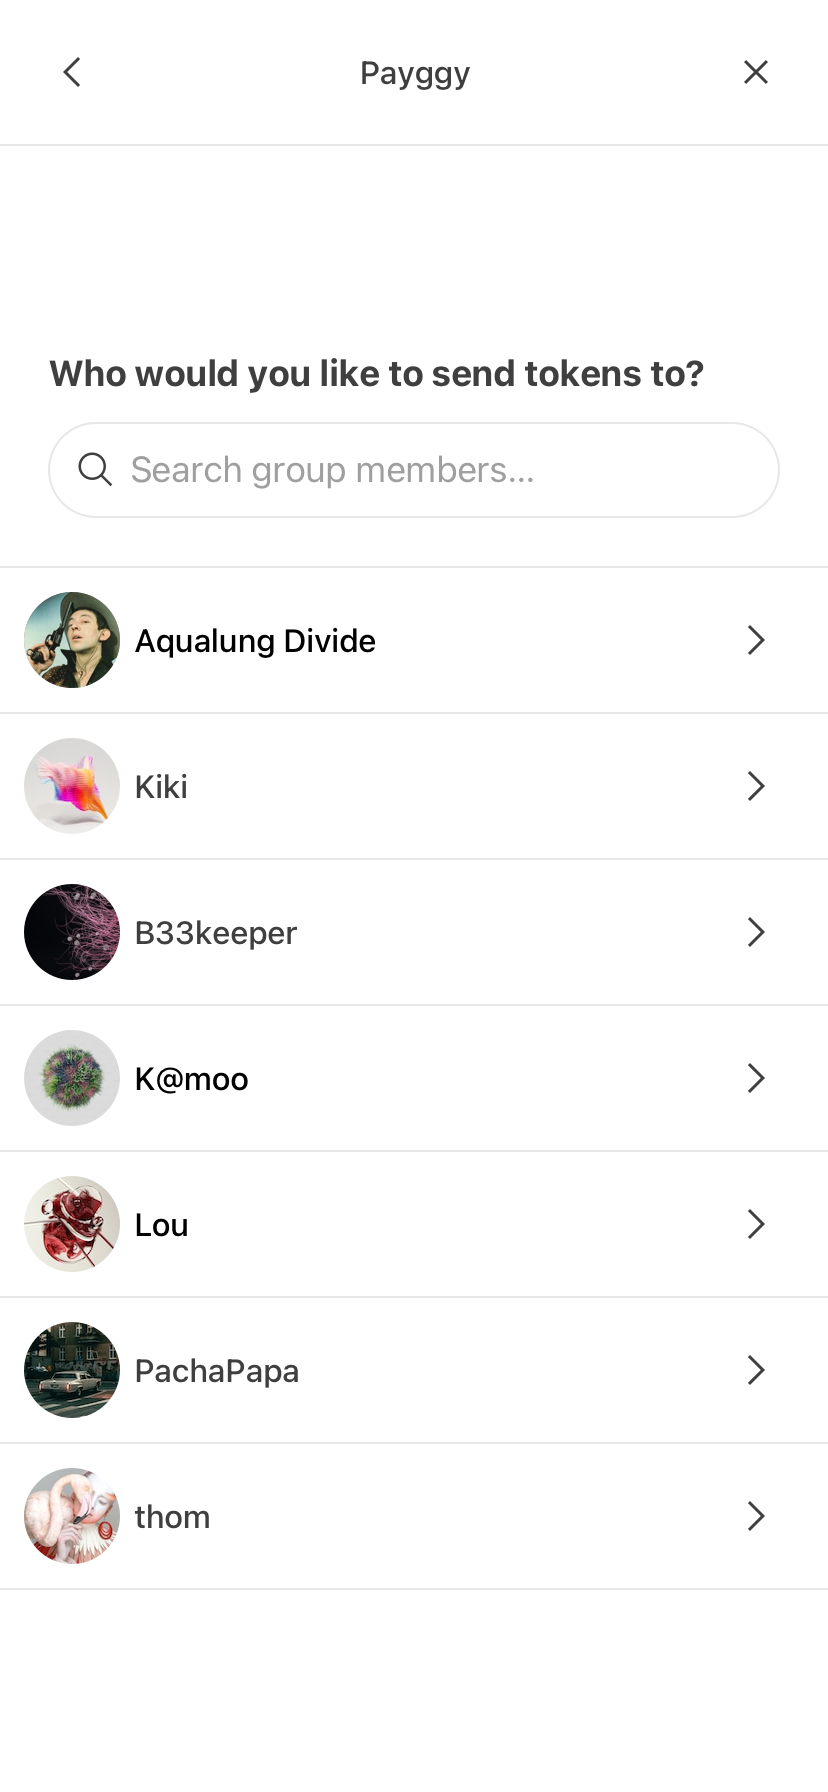
A new Payggy instance can be added to any chat by using the “+” button, next to the message input. In a private chat, the recipient is the other person in the chat. If Payggy is inserted in a group chat, the next step will be to choose who to meet.

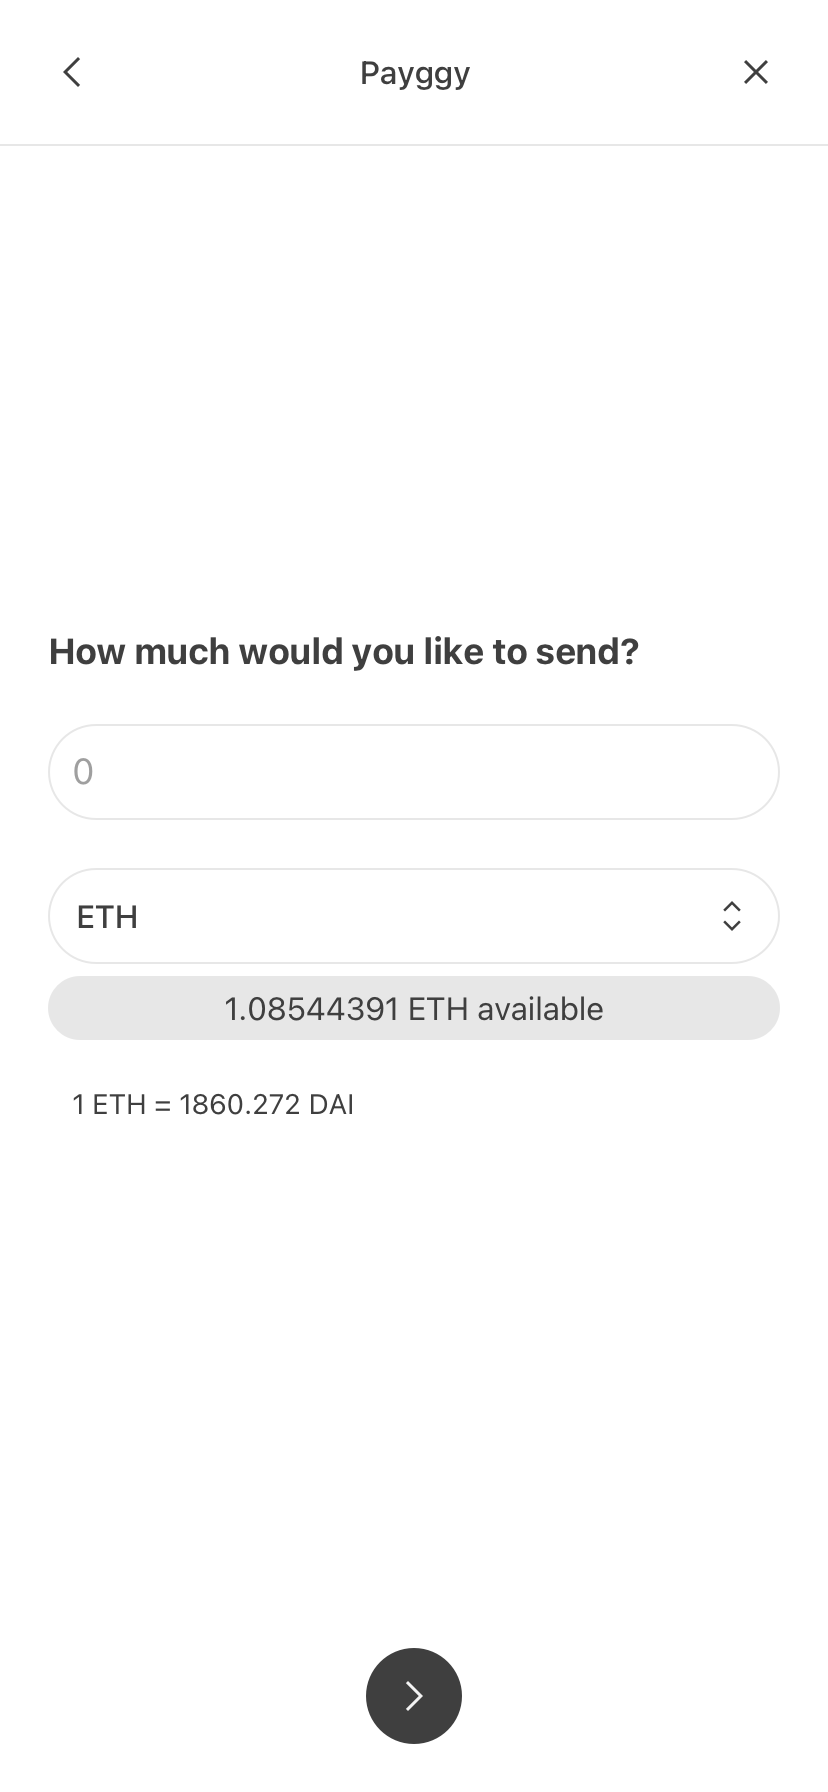
Setting payment details
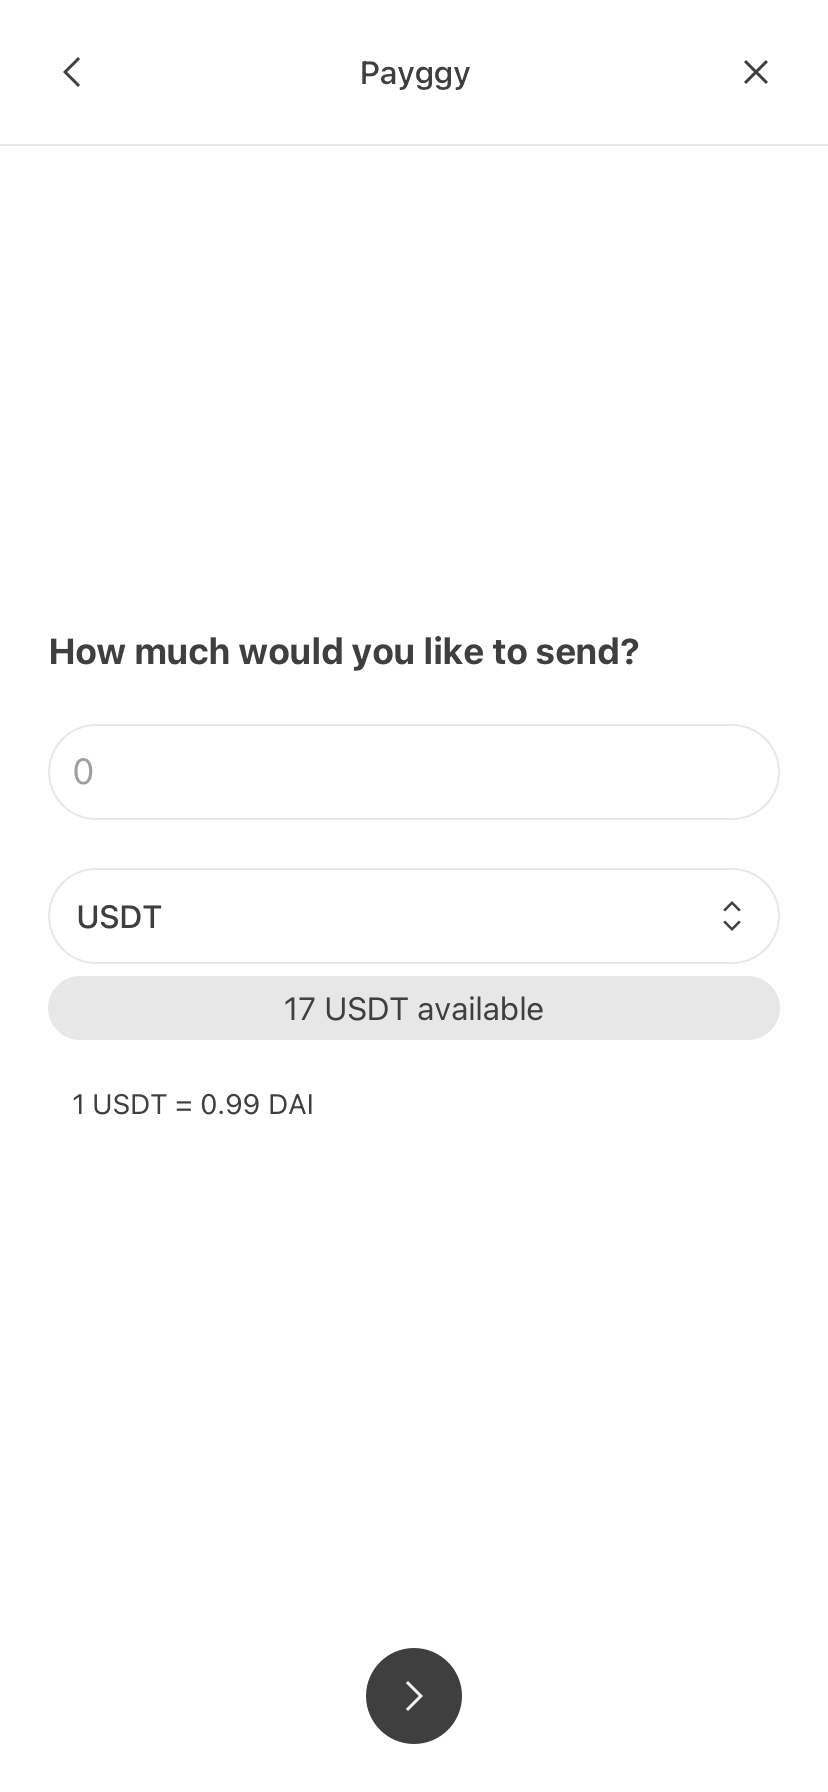
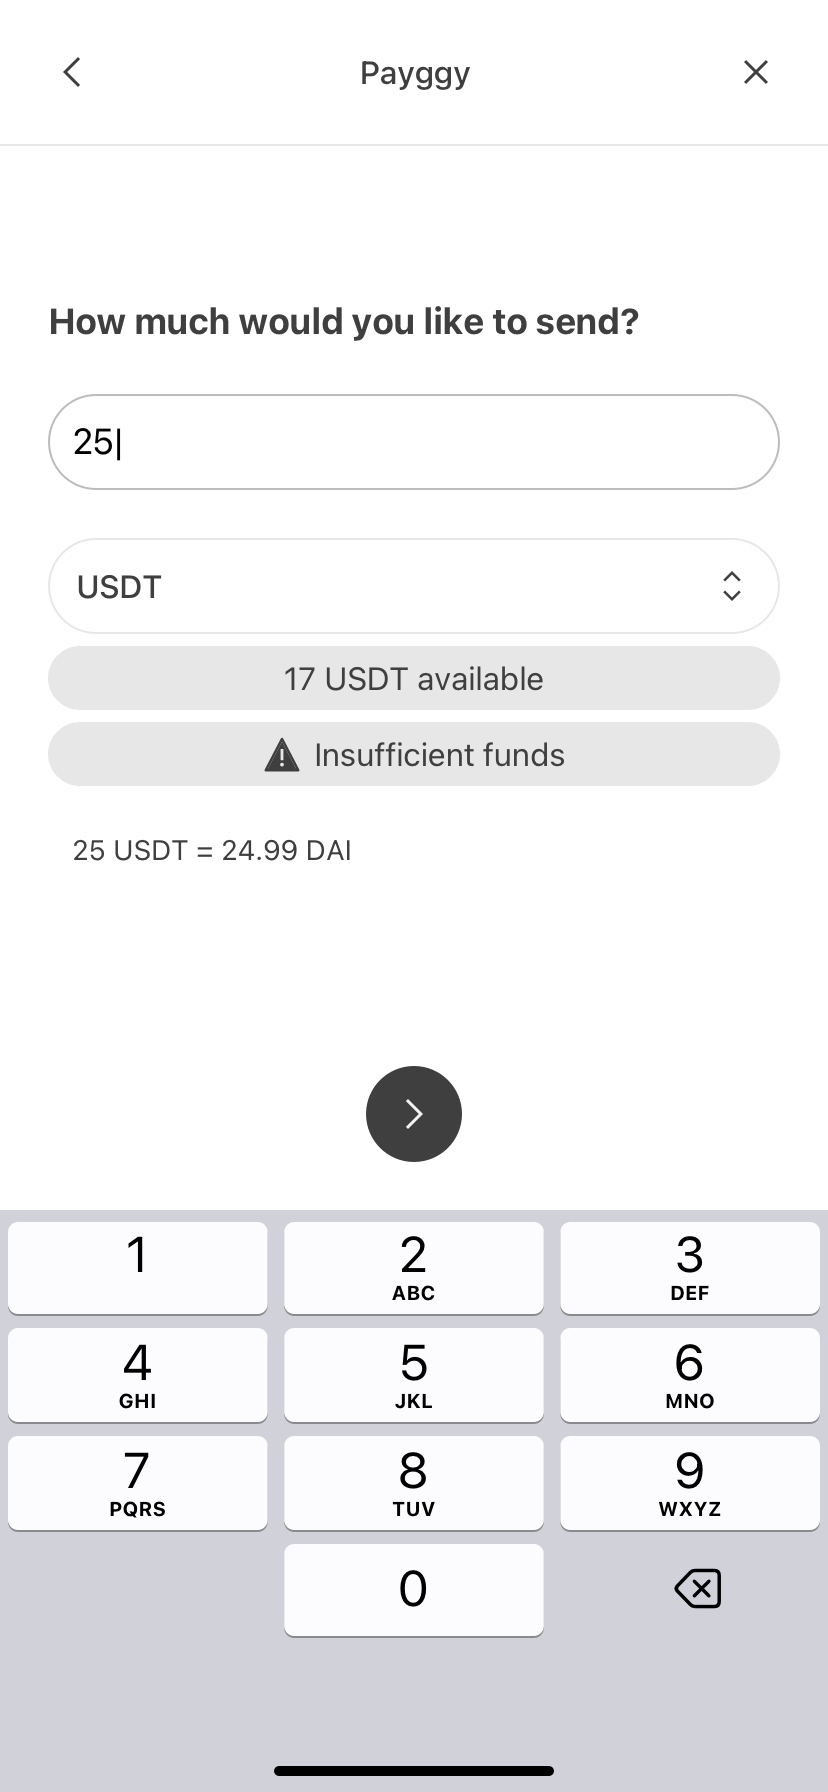
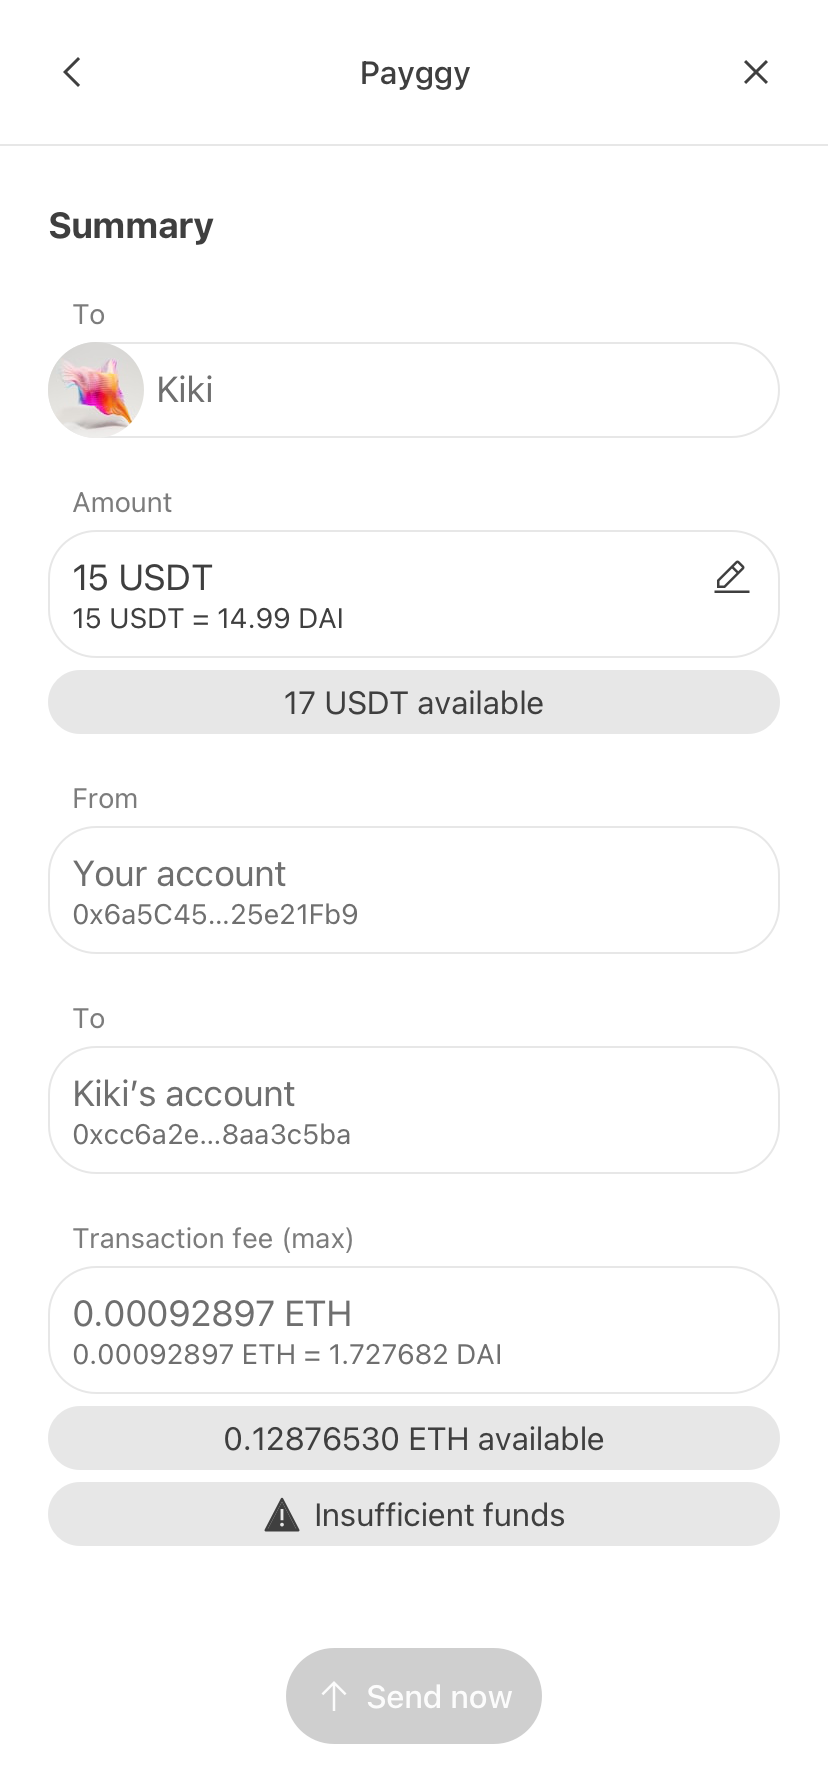
I can select an amount and token, available from my wallet account. Payggy checks available balances based on the currently selected token.

Summary
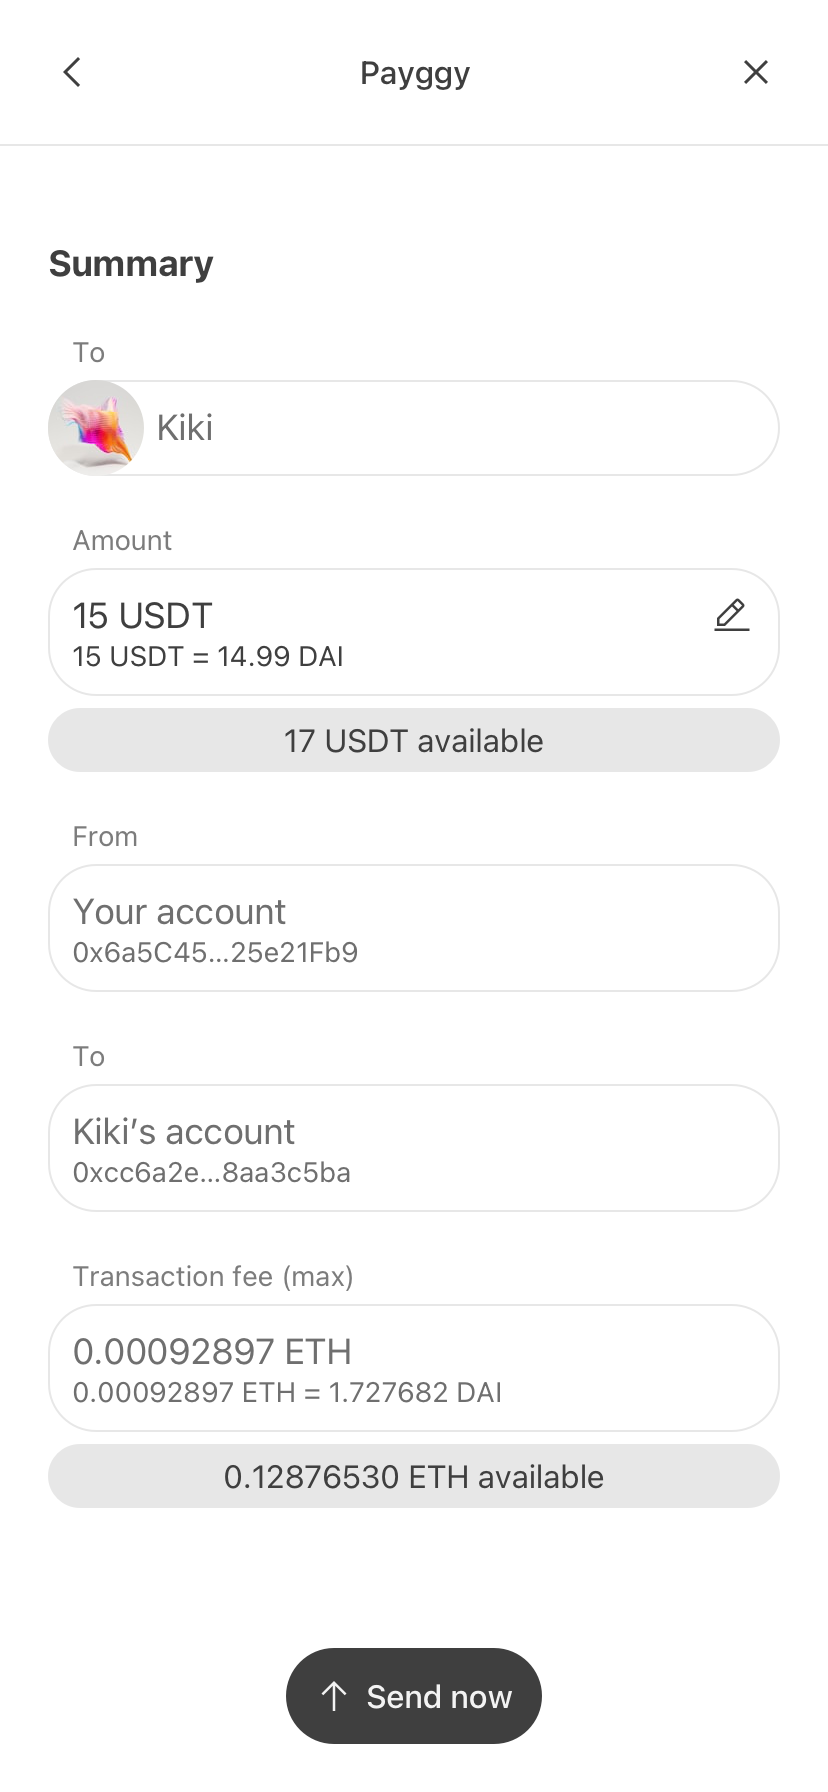
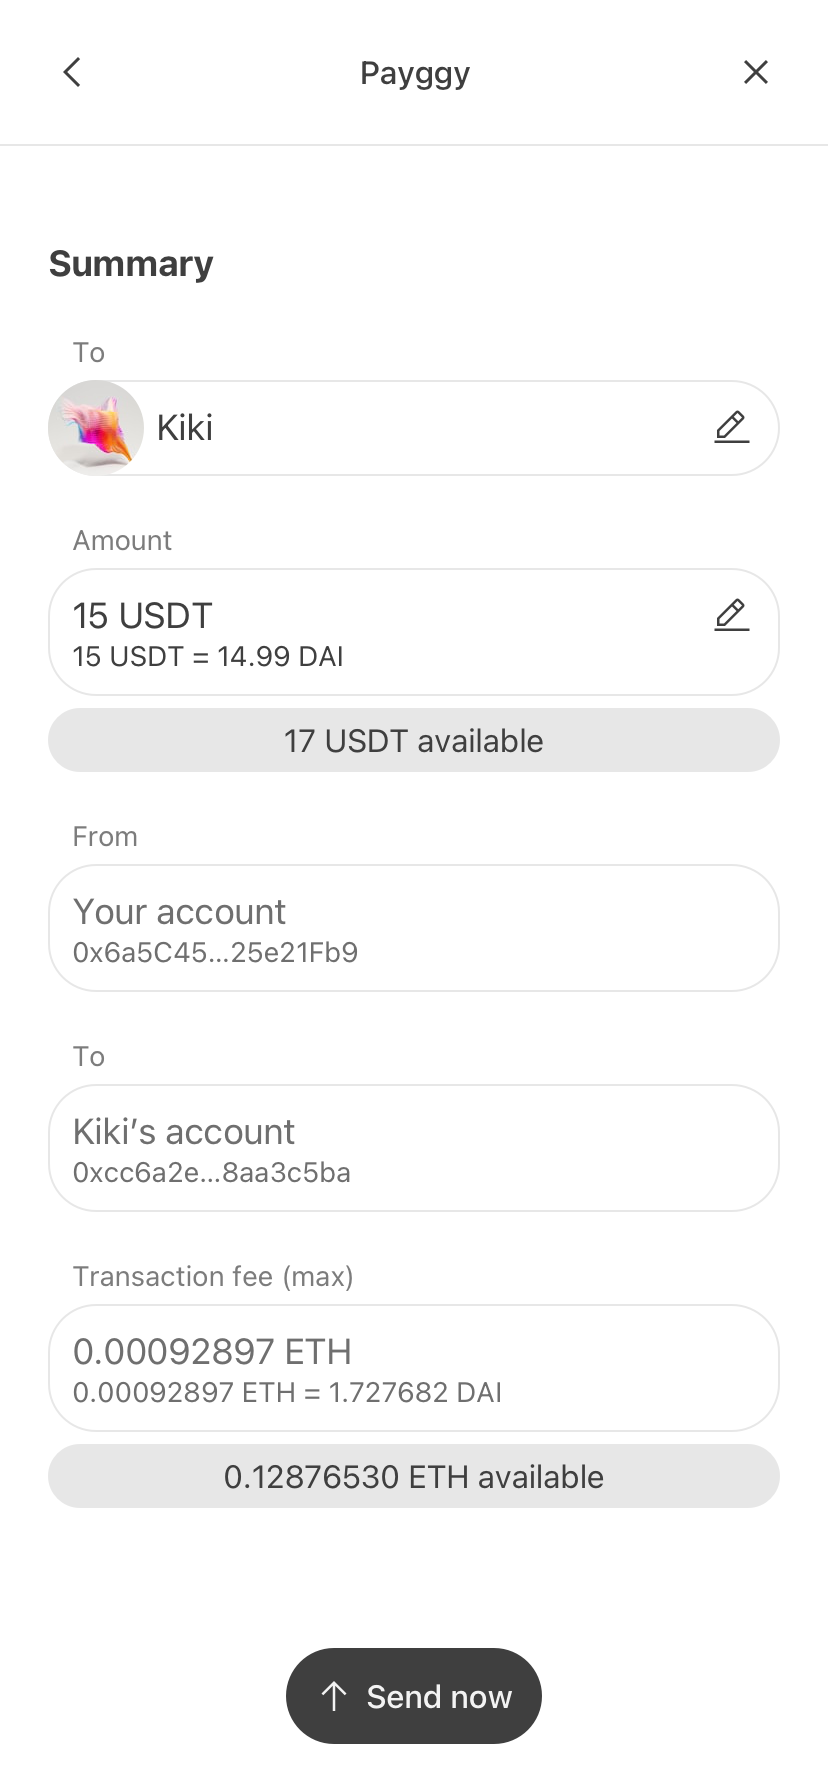
The summary view allows me to check the payment details I provided, before adding to the chat.
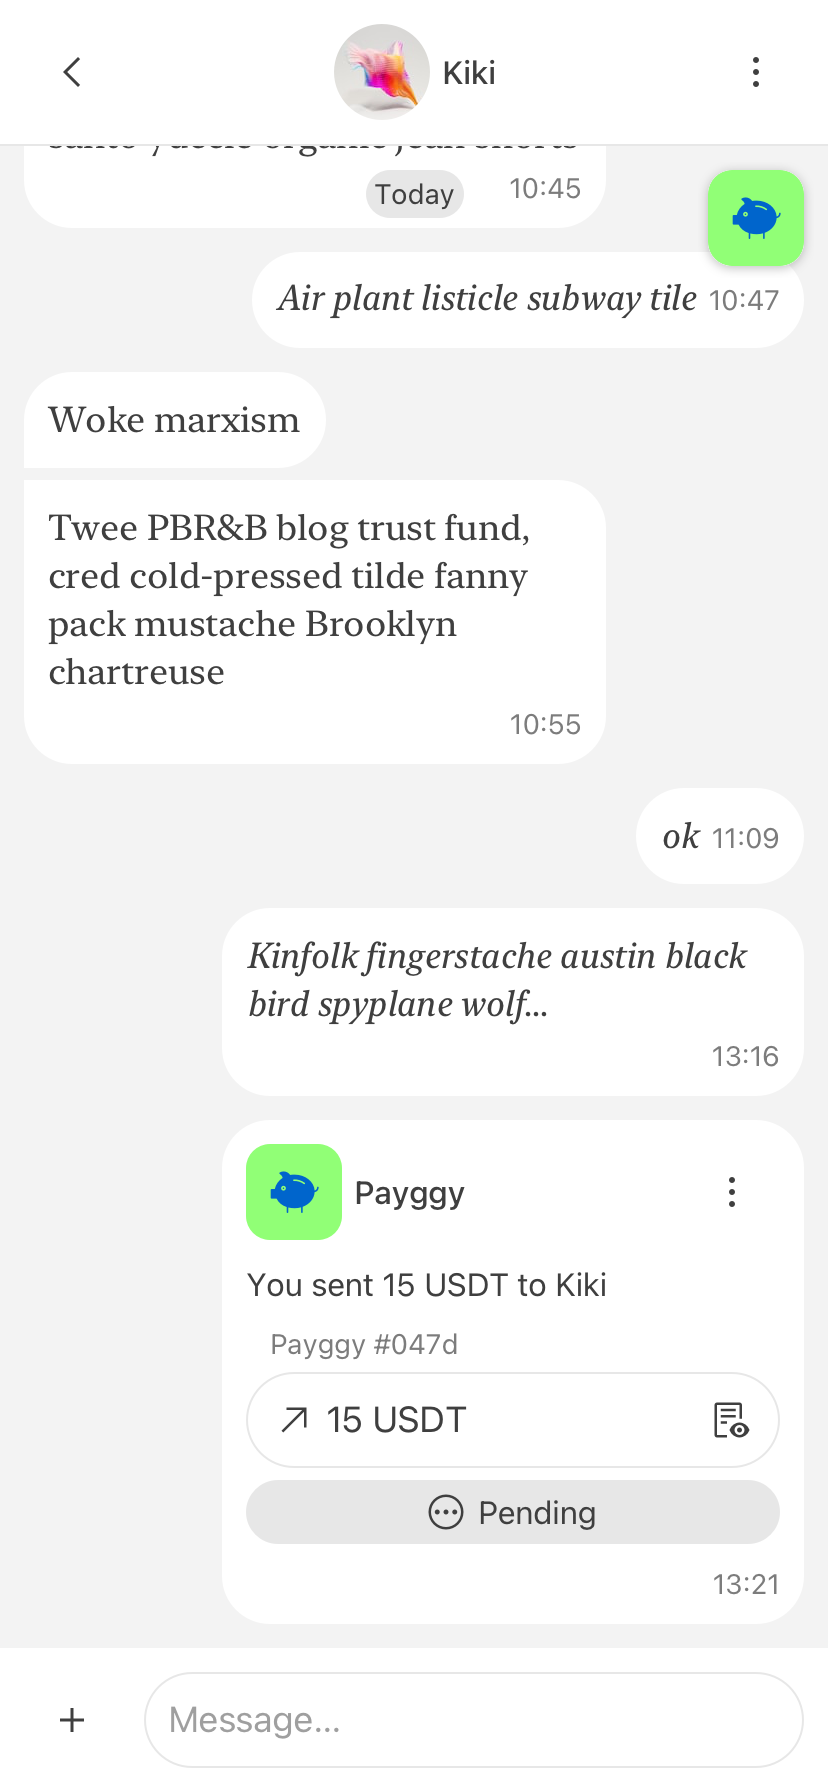
In-chat messages
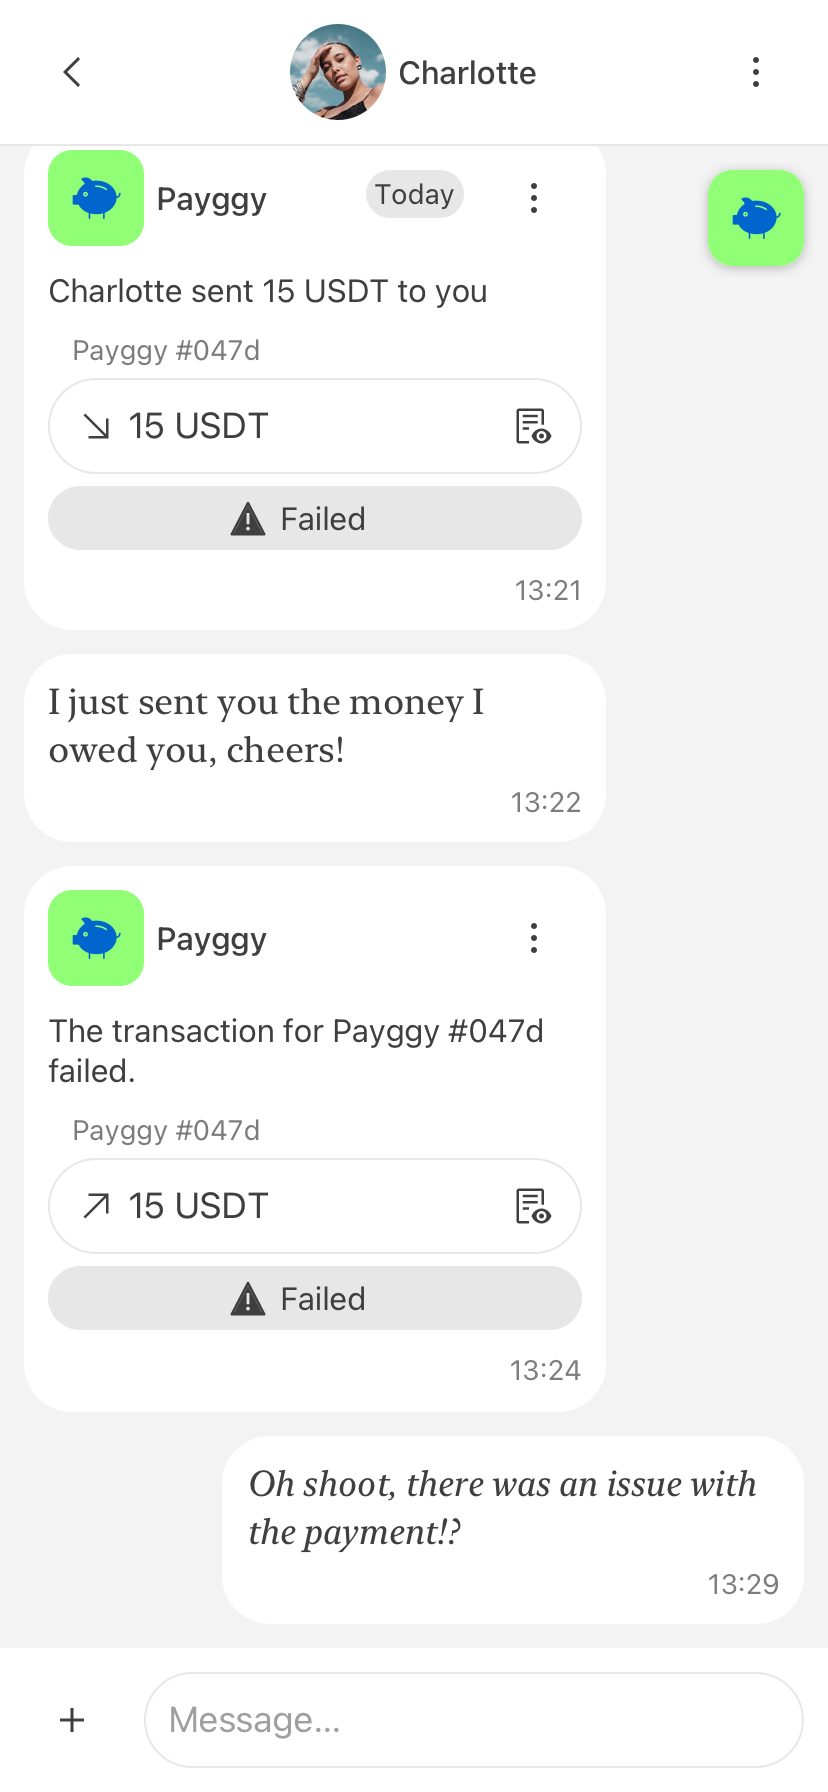
Payggy will post messages to chat when a new payment is sent or when a transaction failed.
Payggy full view
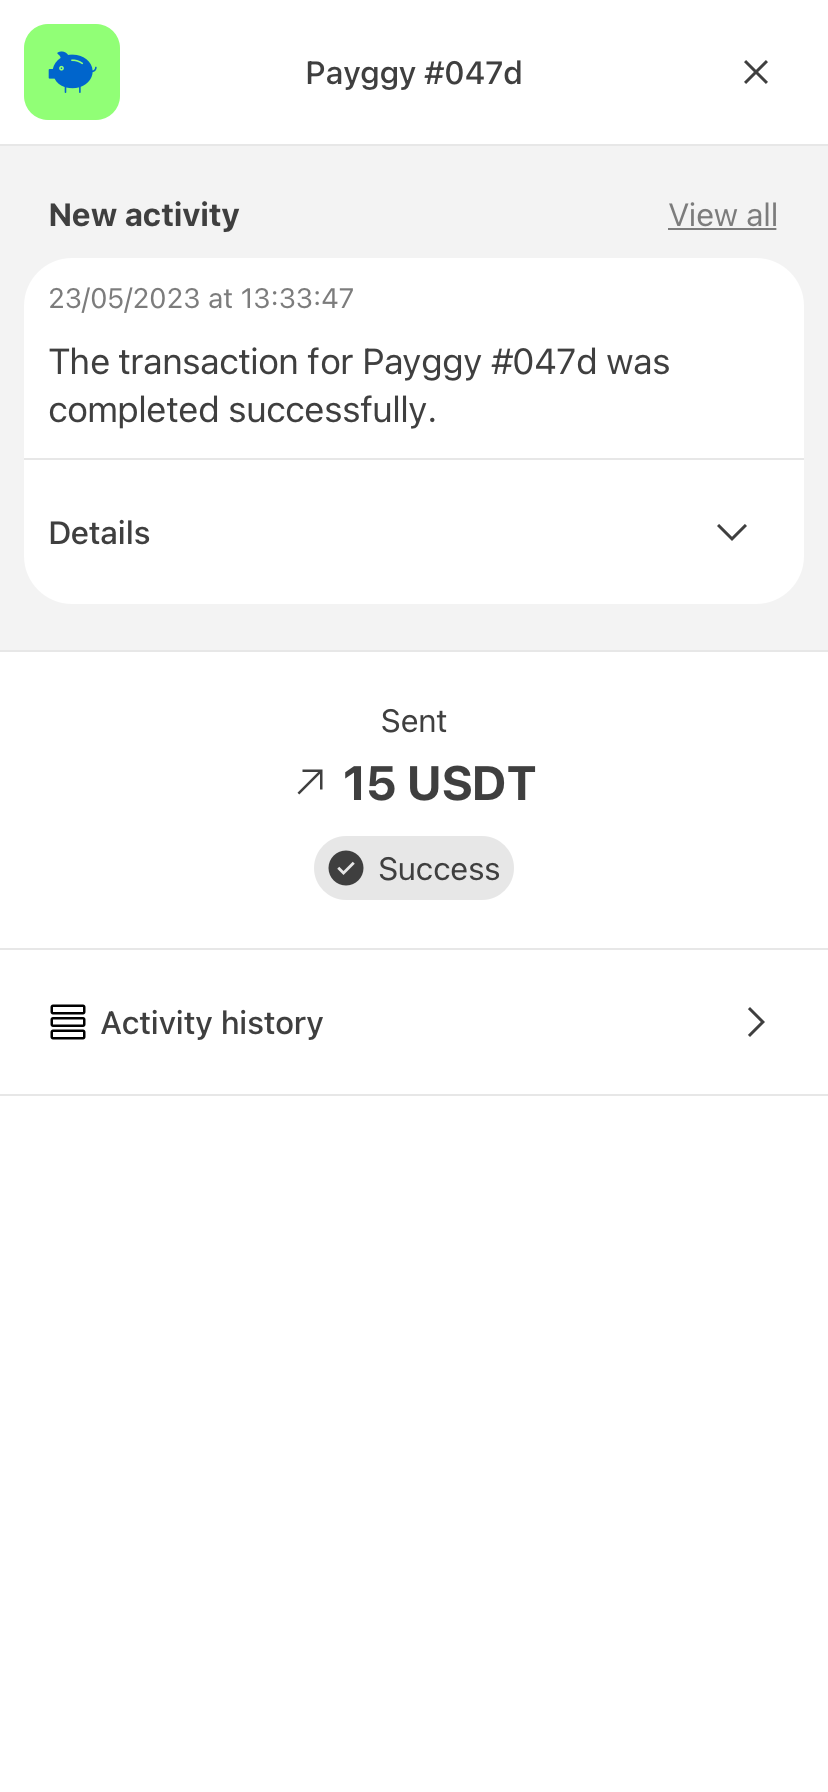
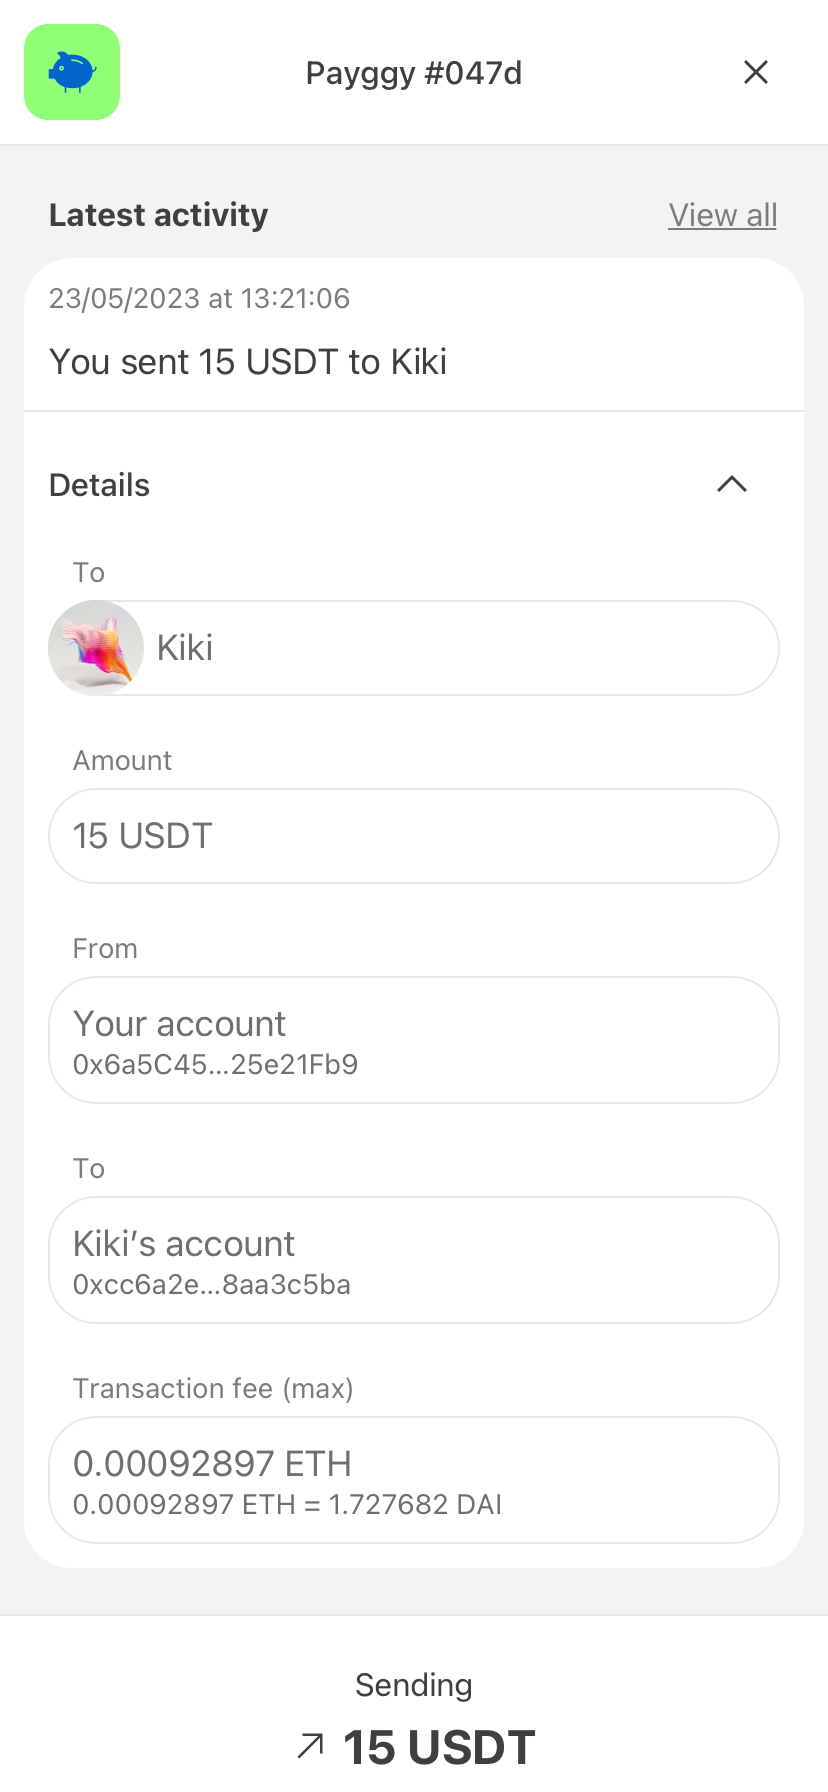
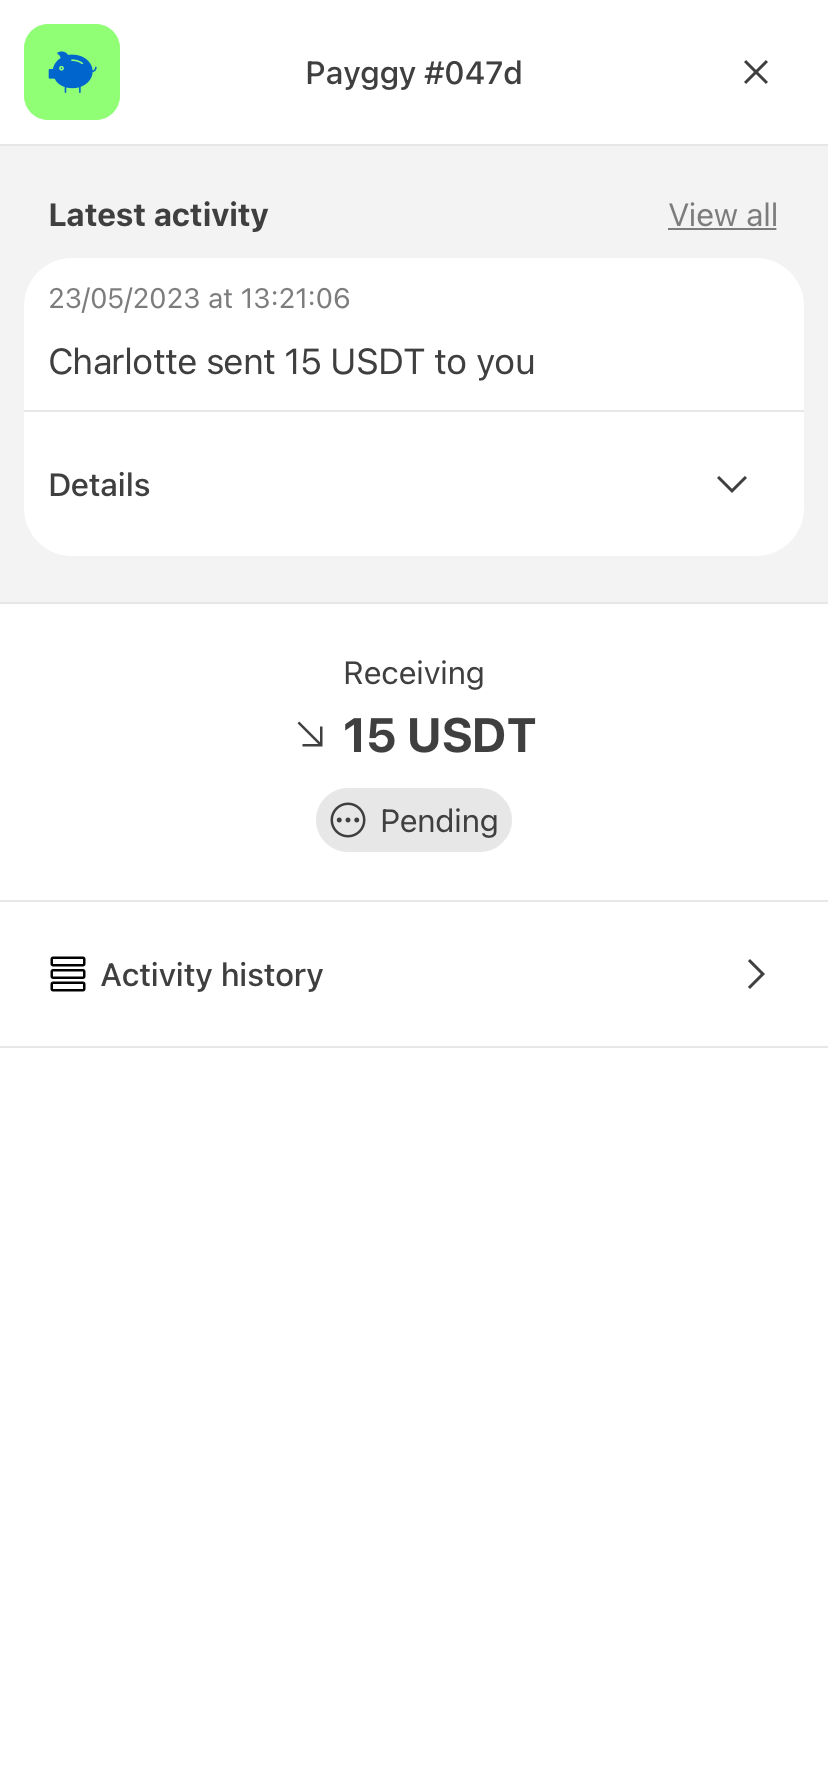
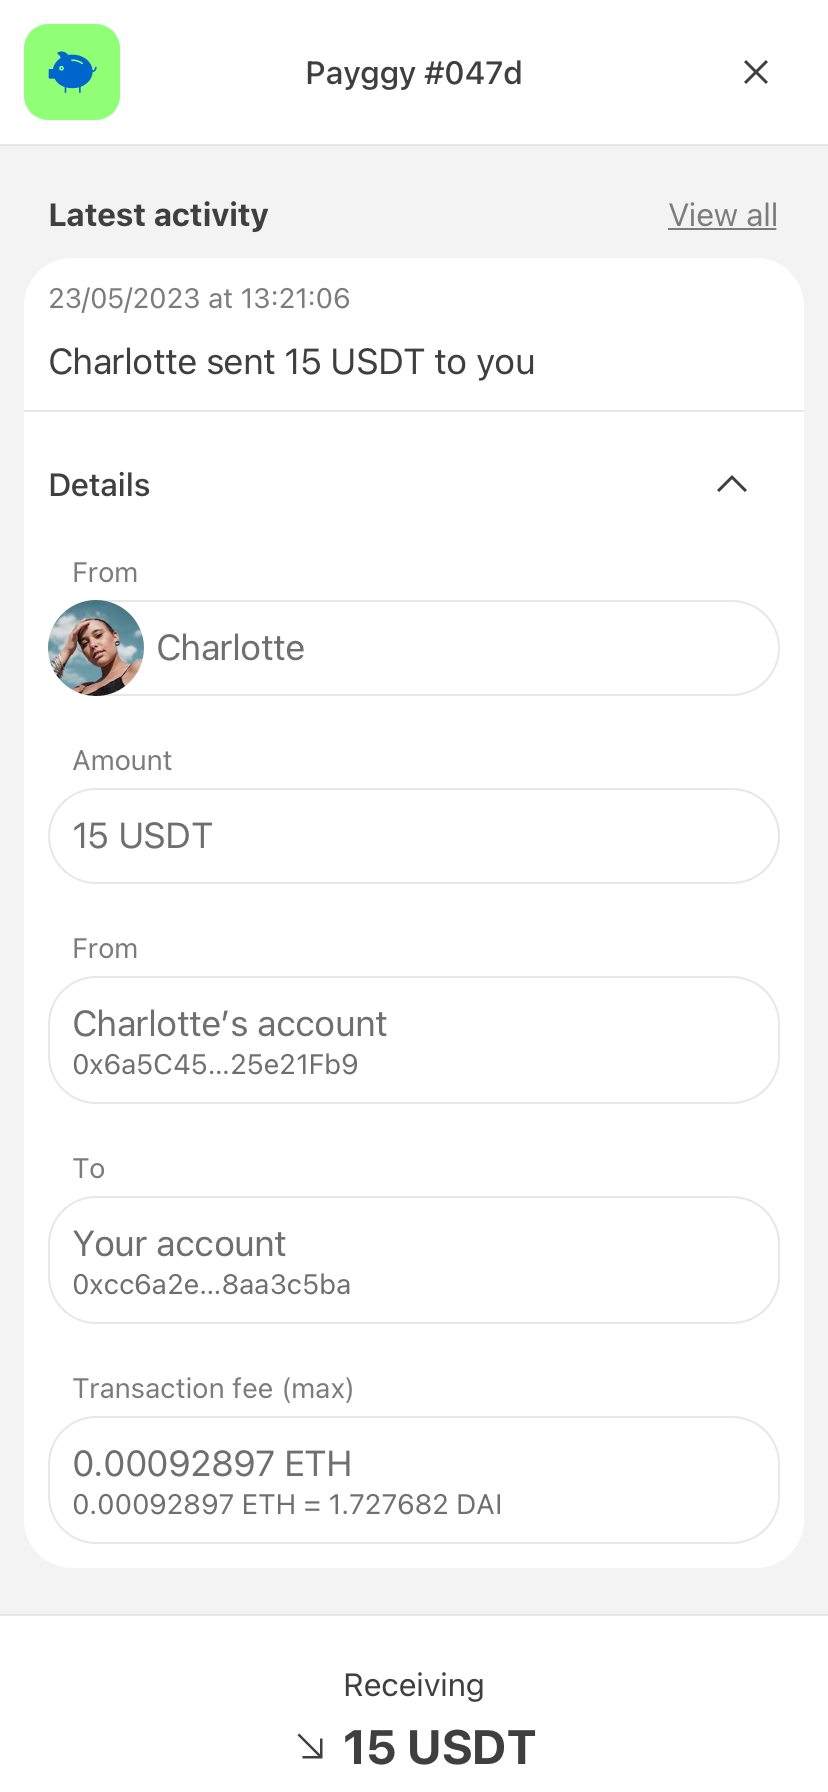
By tapping on any Payggy instance I can access the Waku Object full view, where more information and actions are available.

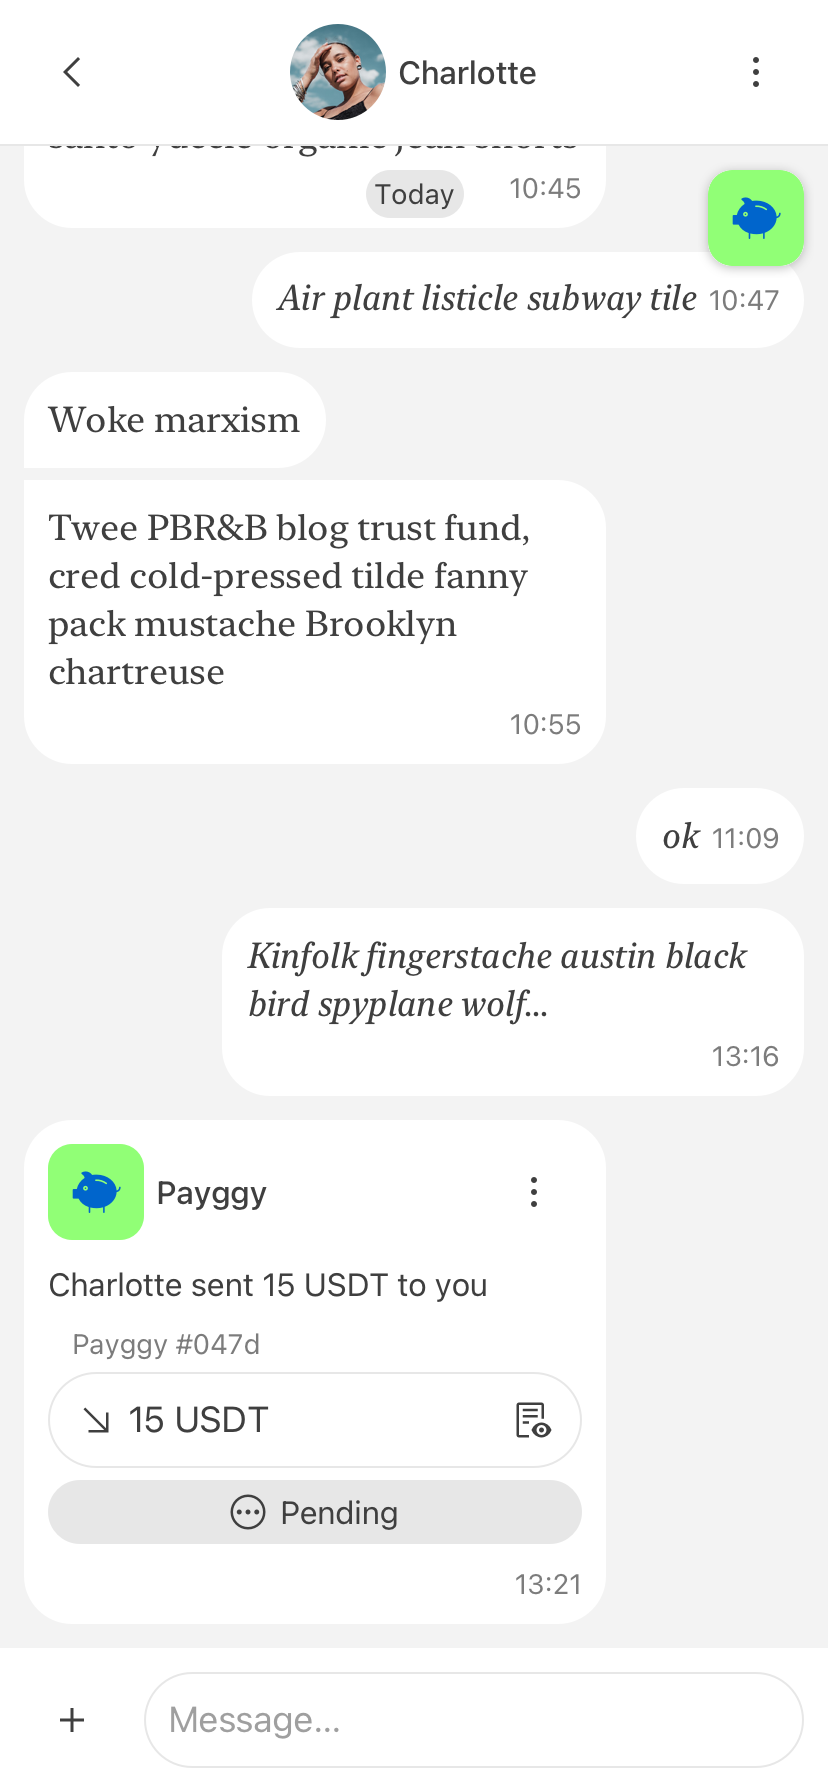
Successful transaction
After the payment is added to the chat, if the transaction is successful the status of the Payggy instance will be updated in the chat message and a notification will be displayed on the Payggy icon in the top-right corner, informing me that more details are available.


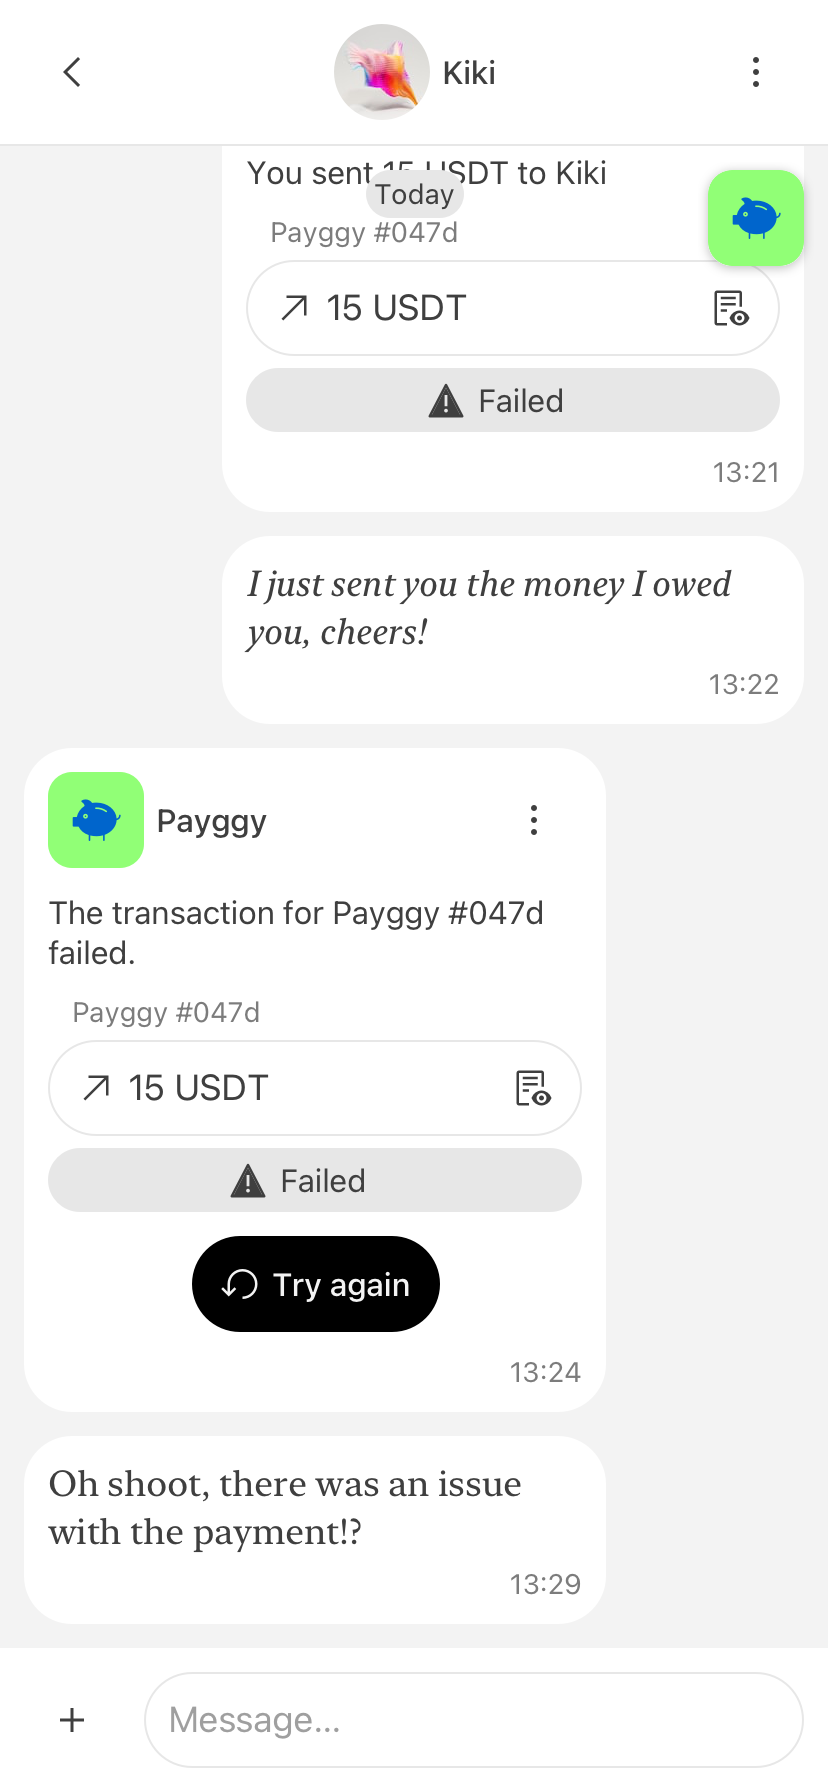
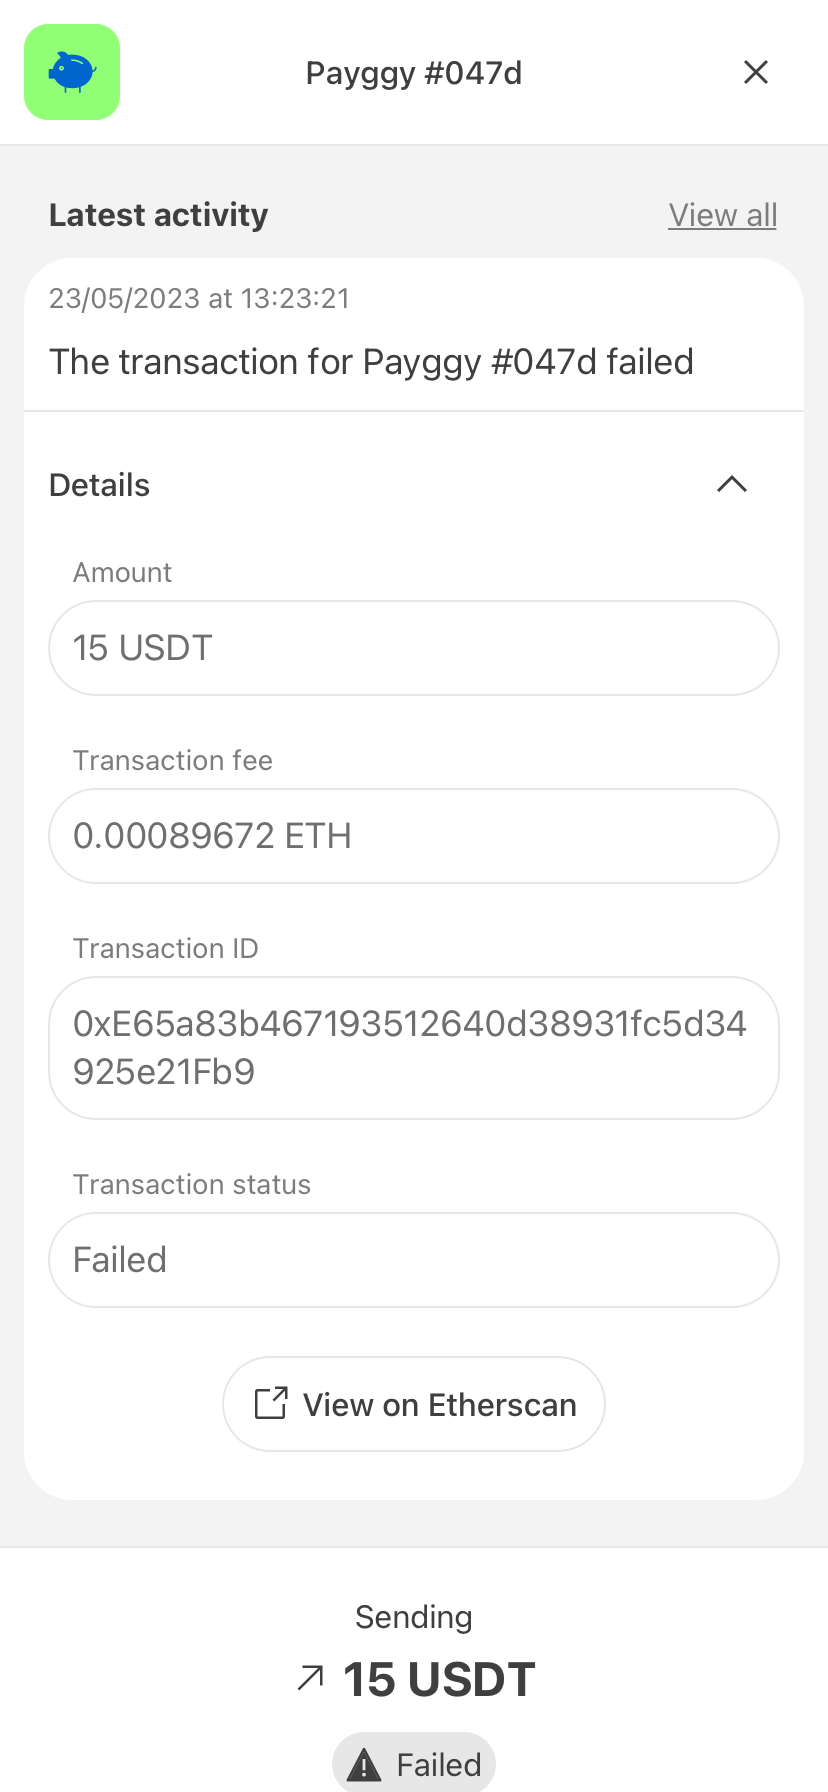
Failed transaction
If a transaction fails, Payggy will send a chat message. More details are available by tapping on the instance button in the message or by using the menu in the top-right corner.


Activity history
By default, only the latest or new (unseen) activity is displayed on top of the full view. All activity related to a Payggy instance can be viewed in the “Activity history” view.